Inkscape comes with some powerful built-in Extensions. These extensions are scripts or programs that enhance the functionality of Inkscape. You can locate Extensions drop down menu in the menu bar at the top. In this tutorial, we will explore Inkscape Interpolate extension in detail.
Inkscape Interpolate Extension
Interpolate generates a series of paths that fill the space between two or more selected paths. Depending on the start and end paths, it affects shape as well as style of the generated paths
Please note that Interpolate works only with paths, so make sure that you convert any object to path before applying this extension. Below is an overview of the parameters of this extension.
Parameters
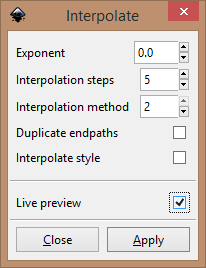
Interpolation Steps: This is the number of paths to generate in-between the selected paths.
Exponent: It controls the spacing between interpolated paths. A value of zero means even spacing between generated paths.
Interpolation method: Its value can be 1 or 2, it affects the curves of generated paths.
Duplicate endpaths: If you select this check-box, it creates a copy of the start and end paths.
Interpolate style: If the paths have different styles, like different color fill, on selecting this check-box the paths that are generated incrementally change their color as well.
Let’s put this extension to action.
Interpolation between same paths
Draw a circle (or any object) and duplicate it with Ctrl+D.
Move the copy to a different position, so now we have two objects of same size and color.
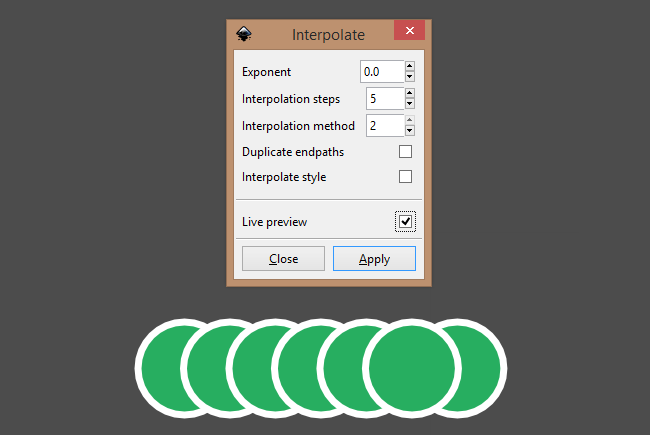
Select both of them and convert to path with Shift+Ctrl+C, then go to Extensions -> Generate from Path -> Interpolate. Enter the following settings and click apply:
Exponent: 0
Interpolation steps: 5
This will generate a group of 5 evenly spaced circles between the selected paths as seen in following image.
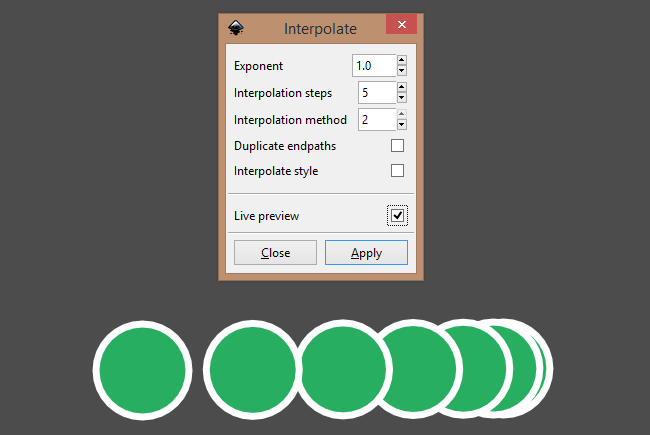
Interpolation between same paths (Exponent = 1)
Repeating the above example, this time change the value of Exponent to 1 to see how the separation between interpolated steps is affected.
When dealing with exponents in the Interpolate effect, the order in which you select the objects also affects the generated paths. In below example, left circle was selected first and the spacing between generated paths exponentially decreases from left to right.
While in following example, right circle was selected first and the spacing between generated paths exponentially increases from left to right.
You can try and experiment with different values of Exponent, you can even try negative values.
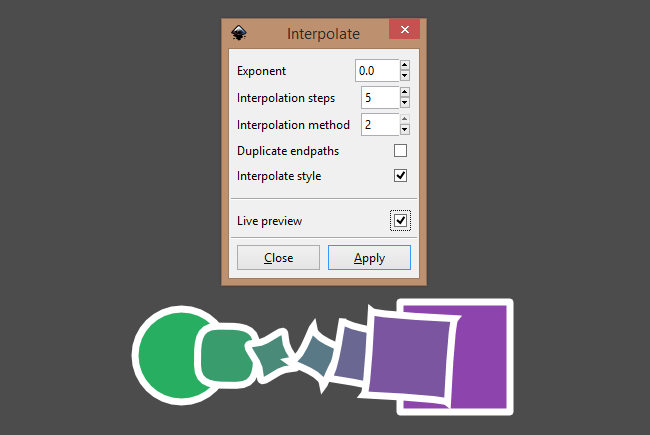
Interpolation between two different paths
Now we will see how Interpolation affects the shape as well as the style of generated paths.
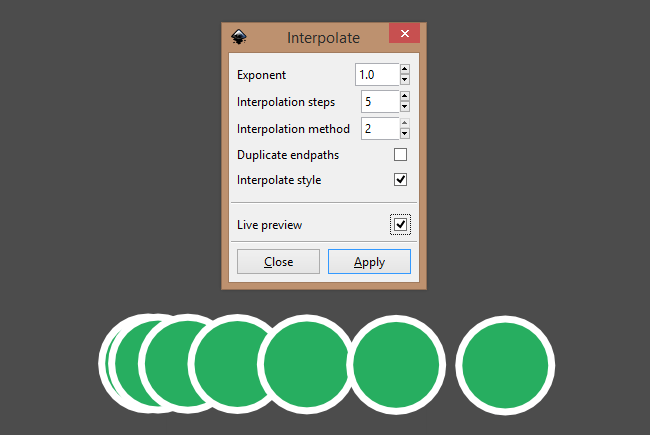
For this, draw two different objects, a circle and a square. Keep their fill-colors different so that we have two objects of different shapes and colors.
Next, when you apply Interpolate extension, tick the Interpolate style check-box. Remember to convert to path before moving ahead.
In this case you will see that both shape and color of the interpolated path change at each step as the circle gradually morphs into a square.
Using Interpolate extension
Let us now see some applications of Inkscape Interpolate extension.
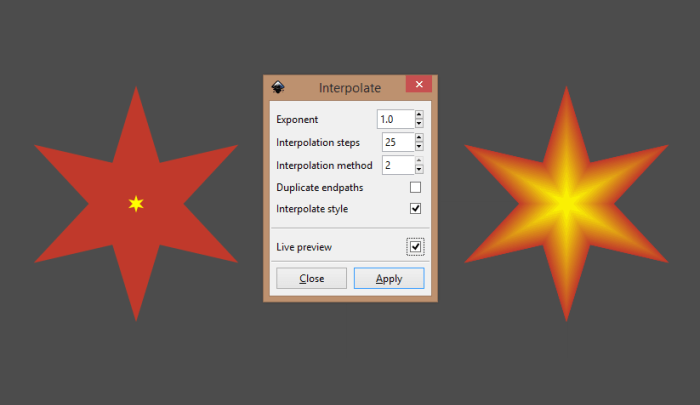
1. Draw a 3D star
Draw a star using Create stars and polygons tool (*).
Duplicate the star and scale down the copy as shown below.
Now select both stars (bigger star first), convert them to path and apply interpolation with settings shown in the image below.
There you go! You have created a nice 3D star. How easy was that!
2. Create flat long shadow app icon
Inkscape interpolate extension can be used to create long-shadow flat icons for your app as seen in the image below. To know the step-by-step process, you can read my tutorial on how to create flat long shadow app icon in Inkscape.
More Inkscape Tutorials
If you found this tutorial useful, you might as well want to check out these beginner Inkscape tutorials as well:
Hi there I have this massive problem with Inkscape Interpolate that I have looked on their Forum that is now closed for comments.
I do not know if other Extensions also have same problems?
It works with Shapes although shows ERRORS BUT NOT with TEXT.
It is so frustrating.
I wonder if it it could be a ERROR in my Lap Top.
Often when people complain about problems they never consider this.
Thanks for reading.
Hi Mike,
Interpolate extension only works with Path.
Before applying the extension, please convert your text to path from menu Path -> Object to Path.
A group of objects will be generated, you need to ungroup (Ctrl+Shift+G) these and then combine them (Ctrl+K) to create a single path.
Let me know if this works or not.
Thanks,
Monika